


In this tutorial I will be teaching you how to add basic authentication to your Rails API using JWT. This authentication will help secure your API from any unauthorized user.
Before we proceed I will like to briefly explain some terms that we will encounter in this tutorial:
ATHENTICATION
According to Wikipedia, authentication is the act of proving an assertion, such as the identity of a computer user. This authentication will serve as routes guide to only allowing verified user with valid token to access our API resources.
And for this act we will be using a very popular gem called jwt or pronounced as ‘jot’
JWT
JWT is short for JSON Web Token, is an internet standard for creating data with optional signature and/or encryption whose payloads holds JSON (JavaScript Object Notation) that asserts some number of claims. JWT allows us to decode, verify and generate secret tokens for our applications.
For this tutorial we will be building a simple Rails CRUD API for posts.
And we will authenticate the post routes to prevent any unregistered and/or not logged in user from having access to the resource that the routes provides.
This functionality can be extended to other routes in your application if you want to, just by adding a simple before_action line of code in your controllers.
NOTE: This tutorial assumes that you already have a basic knowledge of Rails app and Ruby programming language although we will be building everything from scratch.
Without further ado let’s get started
STEP 1: Create a new project
Type the following command in your terminal and click enter
rails new post-app --api
This will create a project called “post-app” and the --api flag will create a minimal build for building api without adding all the bulk required for rendering views. Once this is done head into your app directory by typing cd post-app then click enter.
STEP 2: Configure your GemFile
Make sure you have the following gem in your GemFile you can either add them or uncomment them if already present.
gem 'bcrypt', '~> 3.1.7'
gem 'rack-cors'
gem 'jwt'
Once that is done, in your terminal run the command bundle install to add these 3 new dependencies to your project.
bcrypt: bcrypt gem will help us encrypt a user’s password on registration and also verify the password with the hashed password in our database during login. This will help keep our users account safe should in case someone hacks into our database.
rack-cors: rack-cors will allow us to manage Cross Origin Resource Sharing (CORS). This way we decide which URLs is allowed to make request to our API.
jwt: jwt will let us issue JSON Web Token containing encrypted information on user registration and login. Our API will search for this token in the header of subsequent requests that the user makes to verify if the user is authorized to access that data.
STEP 3: Setup CORS
Let’s setup our cors file; move into config/initializers/cors.rb and uncomment this file
Rails.application.config.middleware.insert_before 0, Rack::Cors do
  allow do
    origins '*'

    resource '*',
      headers: :any,
      methods: [:get, :post, :put, :patch, :delete, :options, :head]
  end
end
then change the origins from example.com to * then save the file.
STEP 4: Generate Models
In your terminal run the commands to create the user and post model
User Model:
rails g model User firstname:string lastname:string email:string password:digest
This command will create a user.rb model in our Models folder and a create_users.rb migration file inside our migration folder in our db directory.
The digest data type used for our password field is a convention that tells bcrypt to encrypt whatever the user enters as password.
Post Model:
rails g model Post title:string body:text
Modify app/models/user.rb to look like this
class User < ApplicationRecord
  has_secure_password

  validates :firstname, presence: true
  validates :lastname, presence: true
  validates :email, presence: true
  validates :password, length: { minimum: 6 }, presence: true
end
Modify app/models/post.rb to look like this
class Post < ApplicationRecord
  validates :title, presence: true
  validates :body, presence: true
end
then run this command rails db:migrate to create our users and posts table in the database.
STEP 5: Create Users Controller
Now to the more fun part let’s create our users controller.
Head into app/controllers create a folder named api then inside the api folder create another folder named v1 now inside the v1 folder create a file and name it users_controller.rb and write the following code.
create: this method create a new user record in the database but before that it ensures that a user doesn’t register more than once be checking if the email provided already exists in the database but if it doesn’t exists then a new record will be added in the database and a JSON web token will be generated for the user using his provide credentials (firstname, lastname, email and user_id from the database) with the help of the encode_token method which I will explain later.
NB: Be careful not to include sensitive user information like password in the generated token.
login: the login method finds the user in the database using their email and if the user exists and their password is verified with the encrypted password in the database by bcrypt using the authenticate method then a token will be generated and sent along with a success message.
SECRET_KEY: Every Rails application has a unique secret key that comes with it. We use the secret key to encrypt our JWT token. Although your secret key can be anything you want but I prefer to use the rails secret key.
encode_token: As the name implies it generate a token using the user’s credentials as payload and encrypt it with our Rails app secret key and an expiration time of 24hours after which the generated token can no longer be allowed on our app. This was made possible by the encode method found in our JWT object.
So now we can generate token for all of our users on successful registration and login, how do we check if user’s subsequent request has this token? Onto the next step
STEP 6: Configure Application Controller
Head into app/controllers/application_controller.rb
This is where we write the method that retrieves the token from a user’s request headers(authorize_request), decodes it (decode_token) by verifying it with our SECRET_KEY and if the token is genuine then the user is allowed access to the data the requested else an error message will be returned.
STEP 7: Create Posts Controller
The post controller will hold our authenticated posts routes. Head into app/controllers/api/v1 and create a new file named posts_controller.rb
Adding the before_action :authorize_request command immediately after the class declaration tells Rails to run authorize_request method (that we created in our application_controller.rb file) first before running any of our posts endpoints. With this setup whenever a user try to access any post routes they will be required to provide an authorization token as part of the request header.
STEP 8: Configure Your Routes
As it is now we can’t consume any of these endpoints because our routes are not setup yet. So for the final step head into the config/routes.rb and set up your API routes like so
Rails.application.routes.draw do

  namespace 'api' do
    namespace 'v1' do
      resources :users, only: [:create]
      post '/login', to: "users#login"
      resources :posts
    end
  end

end
To view all the lists of endpoints available to us run rake routes command in your terminal to get something like the image below.
 And we are done!
Start your Rails server with rails s and try out your API with Postman.
See working examples:
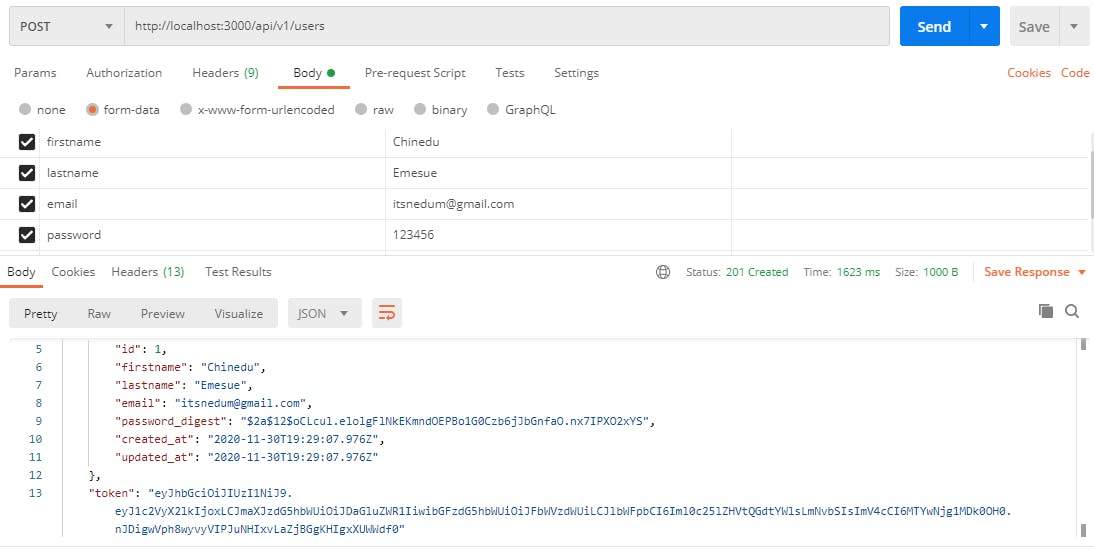 Image 1: Creating a user account
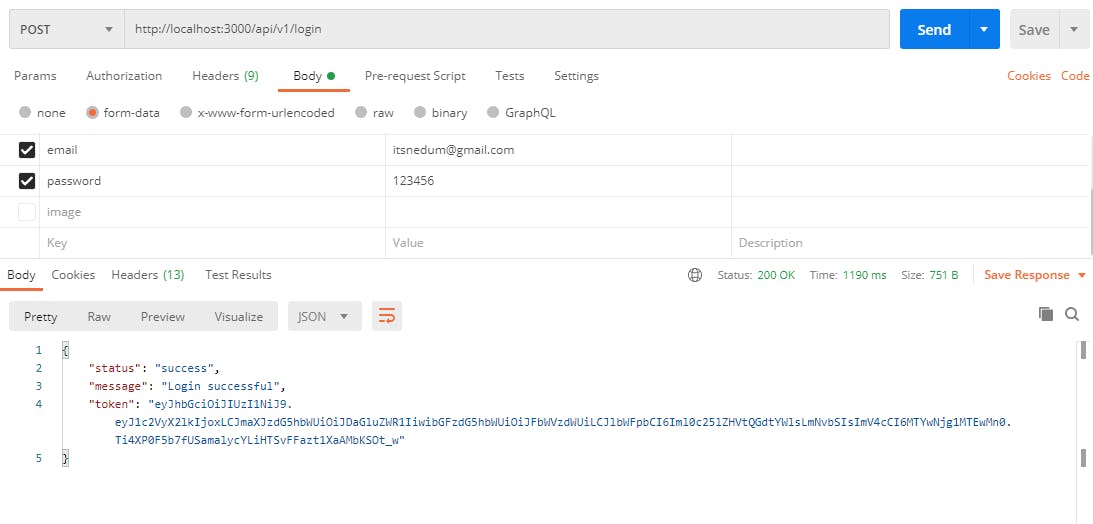 Image 2: Login
 Image 3: Creating a post without JWT authorization token
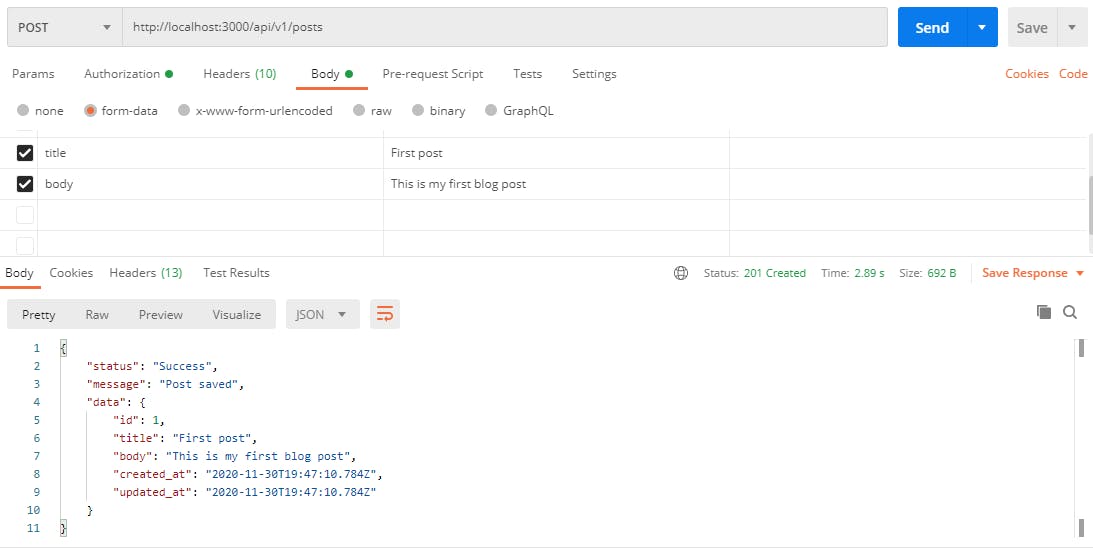 Image 4: Creating a post with a JWT authorization token
Project Repository: https://github.com/its-nedum/rails-jwt-authentication